

If you have ever exported data from QuickBooks, Salesforce, or any other business system and dropped it into Excel, you already know what happens next. The numbers look right. The columns seem fine. Then you try to run a formula and nothing works. A VLOOKUP throws an error. A SUM comes back as zero. A pivot table shows fifteen versions of the same company name.
I deal with this every week. Business owners and finance teams call me after spending hours trying to figure out why their spreadsheet is broken, and nine times out of ten it comes back to the same handful of problems hiding in their exported data.
Most of these issues follow a pattern. Once you know what to look for, you can clean up even the worst export in under an hour. Here is exactly how I do it.
Why Exported Data Is Almost Always Messy
When you export data from accounting software, a CRM, or a database, you are pulling information that was stored in a completely different format. The source system might store dates as numbers, phone numbers as text strings, or customer names with invisible extra spaces that look fine to you but confuse Excel completely.
Exported files also go through conversion layers. A CSV from QuickBooks passes through the export engine, the file format itself, and then Excel’s import process. Each step introduces the possibility of formatting issues. This is not a mistake you made. This is just how data moves between systems. The job is to clean it before you work with it.
Step 1: Remove Extra Spaces Before You Do Anything Else
This is the number one issue I find in exported files, and it causes the most confusion because you genuinely cannot see it. Extra spaces hide at the start of a cell, at the end, or squeezed between words. The cell looks normal. But when Excel compares “Acme Corp ” with a trailing space to “Acme Corp” without one, it reads them as two completely different companies. Your VLOOKUP fails. Your pivot table splits one client into two rows. Your totals stop adding up.
The fix is the TRIM function. If your data is in column A, put this in column B:
=TRIM(A2)
Drag it down the full column. TRIM cuts every leading and trailing space and collapses multiple spaces between words into one. Once the column is clean, copy it and paste as Values Only back into column A, then delete the helper column.
Do this step first, before anything else. It will save you from chasing errors that have nothing to do with your formulas.

Step 2: Fix Numbers That Are Stored as Text
This one trips people up badly. You look at a column of invoice totals or quantities and they look completely fine. You try to SUM them and get zero. You try to multiply and nothing happens.
Excel is treating those numbers as text. It thinks they are words, not values. This is extremely common with financial data exported from accounting systems and anything pulled from a database.
Here is how to spot it: numbers stored as text are left-aligned in the cell instead of right-aligned. You might also see a small green triangle in the top corner of the cell.
Method 1: The quick fix. Select the column. If a small yellow warning icon appears, click it and choose Convert to Number. Done in seconds.
Method 2: Use the VALUE function. In a helper column, type:
=VALUE(A2)
This forces Excel to read the cell as a real number. Copy the result, paste as values back into the original column, delete the helper column.
Method 3: Paste Special multiply. Type the number 1 into any empty cell. Copy it. Select your column of text-numbers. Paste Special, choose Multiply. Excel multiplies every cell by 1 and converts them all to real numbers in the process.
I use Method 1 whenever the warning icon shows up. Method 2 when I need more control. Fixing this one issue alone often makes an entire broken spreadsheet work perfectly.

Step 3: Remove Duplicates the Right Way
Exported data almost always has duplicates. Sometimes obvious, like the same invoice appearing twice. Sometimes less obvious, where two rows match on some columns but differ on others.
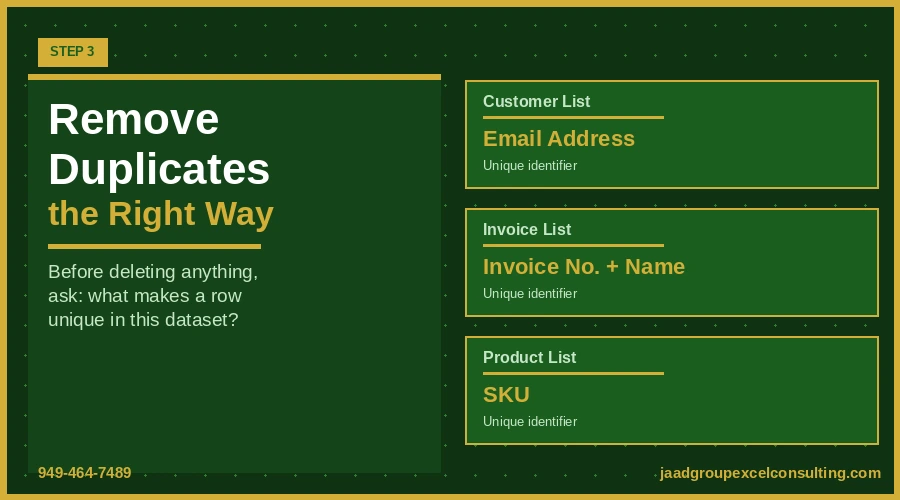
Before you delete anything, ask yourself: what actually makes a row unique in this dataset? For a customer list it might be the email address. For an invoice list it might be the invoice number combined with the customer name. For a product list it might be the SKU. Know the answer before you start deleting.
Once you know that, here is the process: select your entire table including headers, go to the Data tab, click Remove Duplicates, uncheck all columns in the dialog, then check only the columns that define what makes a row unique. Click OK.
One thing I tell every client: do not just click Remove Duplicates with all columns checked without thinking it through. If a customer shows up twice with two different email addresses, those could be two legitimate records, not a duplicate worth deleting. Take thirty seconds to think before you confirm. It is a lot easier than trying to recover data you just removed.
Step 4: Clean Weird Characters from PDF and Web Exports
Data coming out of PDFs, website scrapes, or older legacy systems often contains invisible characters that you cannot see but Excel absolutely can. These non-printable characters sit inside cells and break formulas silently. You might also get visible problems: ampersands that exported as code, random line breaks inside cells, or punctuation that crept in during the export.
For non-printable characters, use the CLEAN function:
=CLEAN(A2)
CLEAN strips out characters that cannot be displayed, including line breaks, tabs, and leftover system characters from old databases.
For specific symbols causing problems, use SUBSTITUTE:
=SUBSTITUTE(A2, “#”, “”)
Replace the “#” with whatever character you are trying to remove. For serious cleanup jobs I combine both into one formula:
=TRIM(CLEAN(SUBSTITUTE(A2, “#”, “”)))
That single formula removes hidden characters, strips the specific symbol, and cleans up extra spaces all at once. I use this regularly on data coming out of older accounting systems and it handles most problems in one pass.

Step 5: Standardize Inconsistent Formats
This is a different kind of mess. The data is technically there, but it is all over the place. Phone numbers formatted five different ways. Customer names in all caps in some rows and proper case in others. Dates that look like dates in half the rows and text strings in the rest.
Inconsistency breaks sorting, filtering, and formulas just as badly as errors do.
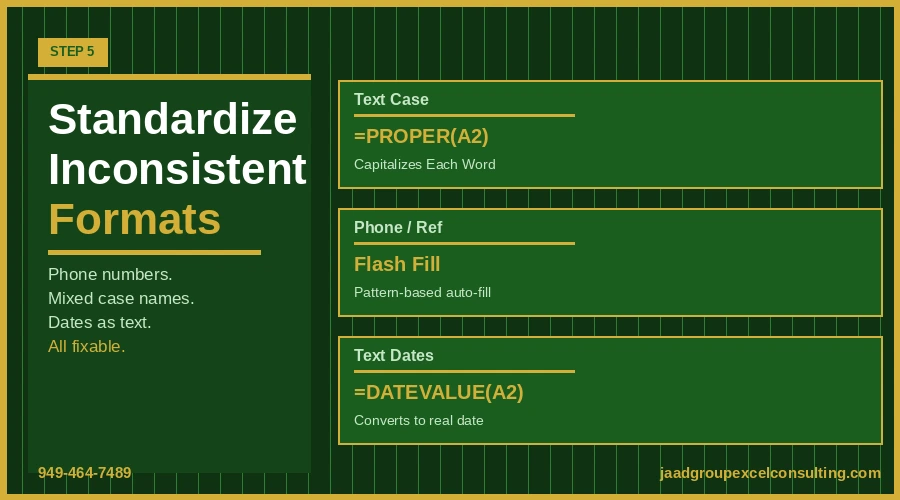
For text case, Excel gives you three functions. UPPER converts everything to ALL CAPS. LOWER converts to all lowercase. PROPER capitalizes the first letter of each word. For names and company names, PROPER is usually what you want.
For phone numbers and other structured data with a repeating pattern, use Flash Fill. Type the first number exactly as you want it formatted in the column next to your data. Start typing the second one. Excel picks up the pattern and fills in the rest automatically. Press Enter to accept it. Flash Fill works for phone numbers, emails, reference numbers, partial names, and almost anything that has a consistent structure.
For dates stored as text, use DATEVALUE:
=DATEVALUE(A2)
Format the result column as a date. This turns text that looks like a date into a real Excel date value you can sort, filter, and calculate with.
Step 6: Handle Blank Rows and Missing Values
Blank rows scattered through exported data are extremely common. Some source systems use them as separators. Others produce them as export artifacts. Either way, they interrupt sorting, filtering, and any formula that is scanning down the column looking for the last row of data.
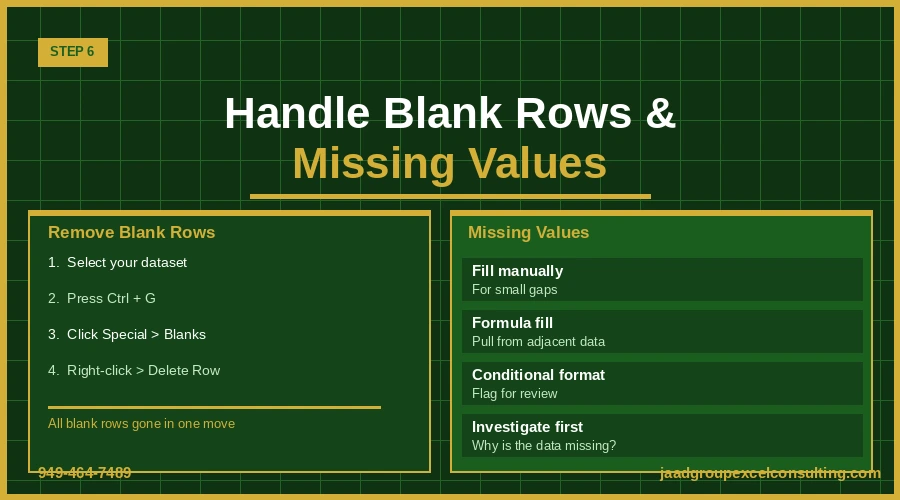
To remove them: select your dataset, press Ctrl+G, click Special, choose Blanks, then right-click and choose Delete, then Entire Row. Every blank row gone in one move.
For missing values within rows, the approach depends on what the data means. If a cell is blank because the original record was incomplete, that is worth knowing before it vanishes from your spreadsheet. Do not just delete rows with missing values automatically. Understand why the data is missing first, then decide whether to fill it, flag it with conditional formatting, or investigate it at the source.
Step 7: Use Power Query to Stop Doing This Manually Every Time
Everything above works well for a one-time cleanup. But if you are dealing with the same type of exported data on a regular basis, doing these steps by hand every week or every month is a real drain on time that adds up fast.
Power Query, found under Data then Get and Transform Data, lets you build every cleaning step once and replay it automatically whenever new data comes in. Connect it to your export file, set up the transformations, and from that point on you click Refresh and the whole process runs on its own.
I have set this up for clients who were spending two hours every week cleaning the same export. After building the Power Query process, that same job takes two minutes. The steps are recorded, the logic is saved, and the cleaned data lands exactly where they need it.
The basic setup: go to Data, Get Data, From File, choose your CSV or Excel export, apply your cleaning steps inside the Power Query editor, click Close and Load. Next time the data comes in, right-click the table and hit Refresh. Power Query does not touch your original file and handles volumes of data that would be painful and error-prone to clean by hand.

When Doing It Yourself Stops Making Sense
There is a point where manual cleanup becomes the wrong answer.
If you are cleaning the same export more than once a month, the time cost is real. If your files have tens of thousands of rows, manual cleaning introduces errors that are hard to catch. If multiple people on your team are each cleaning their own version of the same data, you are creating inconsistency that compounds over time.
At that point what you need is a system, not a process. A Power Query setup that runs automatically. A VBA macro that cleans and formats data with one button click. A structured Excel template built around your specific export format so the data lands clean from the start.
That is the work I do for businesses on a regular basis. Not just fixing a one-time mess, but building something that keeps it from coming back.